Aesthetics With Composites: Frequently Asked Questions (FAQ)

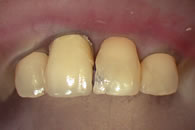
Although my colour match seems right, why don't my anterior restorations blend in?
For a restoration to blend in, colour match is only one of the factors. Other factors must be considered too. The restoration will blend in only when there is convergence of the following factors:
- Colour match
- Good colour mapping
- Opalescence
- Contour
- Margin
- External
- Texture
Colour Match
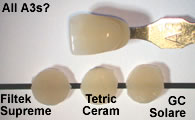
The most commonly used shade guide is the Vita Classic shade guide. The majority of manufacturers base the colour of their composite resins on this shade guide. However, this shade guide does not match well with the range of the colour of natural human teeth! (Schwabacher & Goodkind 1990). Vita has now come up with the Vita 3D shade guide which is more representative of the range of shades of human teeth, but composites are still based on the classic shade guide. To make matters worse, each brand interprets the same colour differently (figure left)! Therefore, when using a new material, you may need time to adjust to their differences.
Tip: Take the shade at the start of treatment (after polishing off any stains, if present) as the tooth may dehydrate during the course of treatment, and the tooth will look lighter when dehydrated.
Good Colour Mapping
The ability to discern the nuances in the colour, opacity, value (brightness) makes all the difference between an acceptable and excellent results, assuming equal technical ability. Let's use something we are all familiar with - a leaf.

We all know most leaves are green. Inspect one against the light and see how many different shades of green go towards contributing to the green of a leaf you are familiar with (see rollover figure left ).
Like a leaf, no tooth is just uniform Vita A2 or A3, and yet this simple instruction is all that is often provided to the laboratory technician in prosthodontics. No wonder so many crowns stand out rather than blend in. We have to develop an eye for distinguishing these variations. It is often the uniformity of colour of our restorations that give them away!
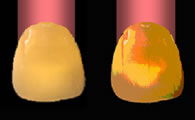
A simple way to evaluate or train yourself to discern these nuances in teeth is to take a digital photograph of a tooth, then use a computer editing program such as Adobe Photoshop and posterise the picture to 4 to 6 colours as you improve. The colour maps(see rollover image left) produced will show you the distribution of the different areas you the distribution of the different areas. The ability to incorporate these characteristics into your composite restoration (or even porcelain/ceramic crowns) will produce a restoration that blends in imperceptibly.
Opalescence
How light transmits through the translucent enamel and reflects back off the opaque dentine layer and through enamel again gives the tooth its opalescence. Deep and also large restorations, particularly, need to provide this different layers of composite to mimic the play of light that gives a tooth the "alive" look, unlike the monotone uniformity of a porcelain sink!
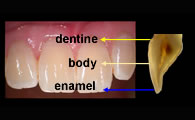
Composites from manufacturers who market themselves for aesthetics always have materials in different opacities to allow us to mimic the opalescence of natural teeth. If you do not want to buy the whole range (for example the 3M-ESPE Filtek Supreme has 34 shades!), at least stock the composites for restoring the most common tooth colours: Vita A1(good for bleached teeth), A2, A3, A3.5, B2. That should cover about 75% of your patients (Guo et al. 2000). Choose the shade of the various opacities from the different areas of the tooth (figure left) or follow the guidelines the manufacturer provides. Using a restoration technique suitable for the size, depth and translucence of the tooth you are restoring, you will be able to get a very good aesthetic result.
Contours
Marginal Contour
Enamel bevels not only increase the area for retention but provide a gradual transition from the composite restoration to tooth structure:
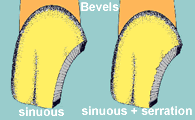
- The wider the bevel, the easier it is to mask the transition from restoration to tooth.
- Make the bevel sinuous as straight lines are also more obvious, particularly for larger cavities like Class IVs.
- Make a shallower serrated bevel that is irregular and jagged. This will make the composite restoration margin even better camouflaged (figure left).
External Contour
This must also follow that of the tooth. For example, a flat surface on a gently curving surface will catch the light and look obvious.
Surface Texture
The surface texture of the restoration must also match that of the tooth. Not all teeth have a smooth, polished surface. Some still have their perikymata, and if the restoration is highly polished, then it reflects a lot more light than the adjoining tooth structure and will stand out rather than blend in.
When do I need to use a layering technique?
To produce restorations that blend-in requires playing around with your materials to learn the opacity/translucency of dentine, enamel and incisal (translucent) shades and how the they interact in different thickness.
Single Shade Technique
Use of a single body shade is usually sufficient in small to medium size cavities.
Two Layer Technique
Use of a dentine layer with a more translucent enamel outer layer is suitable for moderate sized cavities that show on the labial surface.
Multi-layer Technique
Is often required for Class IV cavities, and also for closing diastemas.
How do I perform the layering technique?
Two Layer Technique
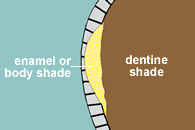
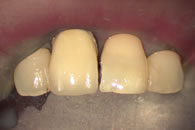
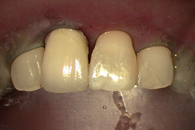
One less obvious area to use the 2 layer technique is when the cavity is entirely on the lingual, with only a thin "hollowed-out" enamel shell in parts. As the thin remaining enamel wall is very transparent, using a single dentine shade will cause the opaque composite to shine through the enamel like headlights! Using the more translucent body shade to restore the whole cavity will make it seem very gray as too much light shines through.
This problem is solved by placing an enamel or body shade composite to thicken the area of "hollowed-out" labial wall, before restoring with a dentine shade (see figures below).



Multi-layer Technique
The multi-layer techniques may be broadly categorized into:
- Template Technique
- Free-hand Technique
- Combination of the above (celluloid crown form)
Template Technique
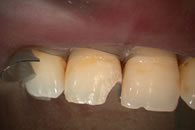
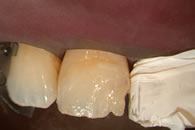
Restoration of Class IV cavities or diastema closures can be simplified if there is a lingual template to build against. Make an impression of the lingual aspect of the tooth (together with a few adjacent teeth to allow stable localization) either on a diagnostic cast or in the mouth (if there is an acceptably shaped restoration you are going to redo) using silicone putty or even alginate, if it is going to be used immediately. Cut away any excess on the buccal to the incisal edge, if necessary, and the template is ready for use.....

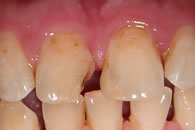
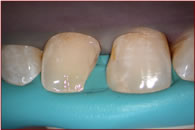

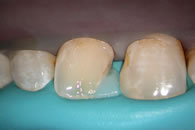
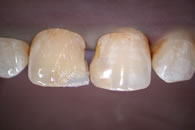

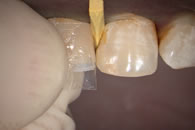
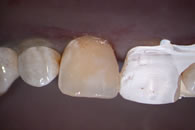

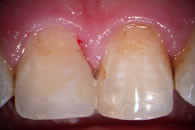

The use of a Teflon tape separator is optional. If the adjacent enamel is protected and is not etched, after completion of the build-up, the two teeth can be separated by wedging the teeth apart with an instrument.
Tip: Warn the patient that separating the teeth will cause a "crack" sound. The sound can be unsettling for a nervous patient.
Free-hand Build-Up
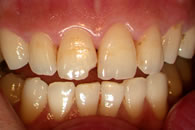
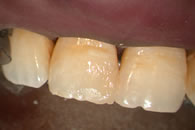
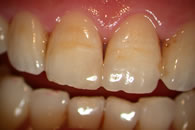
.This requires a little more sculpturing skills..... whichever technique that is used, we have a tendency to want to place each composite layer on nice and smoothly. Keep this skill for the most superficial layer. For the inner layers, this flat surface will reflect a lot of light through the overlying superficial enamel layer of composite, and the inner dentine layer may appear to shine through rather then blend in. A slightly irregular, textured surface that reflects light in different directions will produce a more natural looking result. So if my surface layers in some of the pictures on this page look a little rough ....... I have not developed the shakes - I still have a steady hand. It's all with a purpose.




Celluloid Crown Form
Use of preformed celluloid matrices can help when you are not so comfortable doing full free-hand build-up, but there is less control of the distribution of the various layers. After free-hand build-up of the dentine core, the celluloid matrix can be filled with whatever surface composite you have selected, then seat over the core for instant anatomy. But if more than one shade (for example enamel shade and translucent composite) is placed, how they will interact and flow as the matrix is adapted will not be very predictable. Where teeth are more uniformly coloured, this will work well. Polymerisation shrinkage is not a problem because of the low C-factor for Class IVs.
🔝


